HOW TO SETUP CAMPAIGNS WITH WP CONTENT PILOT PRO?
We expect that you are already familiar with this awesome plugin. As one of the most powerful and productive WordPress Plugin, this is really a game changer for you. You must already be a big fan of the free features of WP Content Pilot. Here, we are going to introduce you to the PRO features. You will definitely love the power and diversity of these PRO features. Note that, you must buy the PRO version to enjoy the advanced feature and PRO campaigns. Let’s begin with the list of PRO only campaigns:
- ClickBank Campaign
- BestBuy Campaign
ClickBank Campaign:
First of all, ClickBank is the most well-established affiliate marketing program. ClickBank works as a mediator company between digital content creators and affiliate marketers. Secondly, if you are a ClickBank enthusiast or about to become one you should know more about ClickBank. We should rather focus on “how you can set an automatic campaign in ClickBank with WP Content Pilot PRO”. Though we expect that you are familiar with the basic functionality of our plugin, but still we are going to give you a walk-through of this campaign. Below is our familiar campaign interface:

Campaign Options:
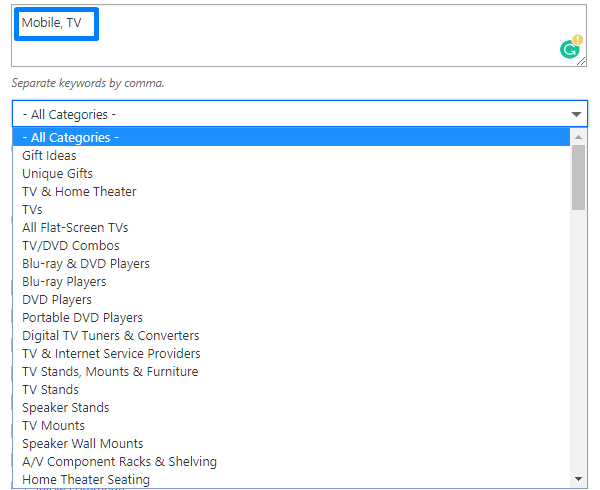
First of all, you need to start with the name of the campaign. For demo purpose, we have named our campaign as “ClickBank”. You are free to choose any name. Then comes the campaign options. Everything is very straightforward, so you should be quite comfortable with everything. Now that you have named your campaign, it is time to choose the campaign type. Select ClickBank as the campaign type from the drop-down menu. You have successfully set the first campaign option and move to the keywords option. You can put a list of keywords here separated by a comma. WP Content Pilot PRO will grab posts based on those keywords. Next option is the exclude words from the search. This will exclude specific words from your search based on your preference. Next comes the category section of click bank. All the categories are listed here. You can select one from the drop-down menu. You can opt to stick with “All Categories” if you do not have any specific choice.

Next steps:
Your next stop is the keyword type. Here you have two different options, you can either choose “Exact Words” or “Any Words”. “Exact Words” option is strict about the search and it will search for exact whole keywords. On the other hand, “Any Words” is more flexible and it will look for a match for any of the words. You have successfully completed another important step. Next is the “Min Words” and this allows the control over the minimum words that you want in your post. NOTE: Choosing a large number may make it difficult for the plugin to grab post based on the campaign type. The next feature is “Content-Type” with two cool options named as “HTML” and “Plain Text”. You can select any of them based on your preference. Finally, we are at the last option called the “Additional Settings” of the “Campaign Options” sections. The additional settings section is loaded with lots of different options and they will give you more control over the post. Play with them as you wish to make sure you are getting the desired output.
NOTE:
If you do not understand anything hover over the question mark next to an option. It will display detailed information about that particular option. In addition to that, one more thing that you must understand is the “Post Template” under post settings. If you do not include the image in the post template, then WP Content Pilot will not fetch any images. So, make sure you add all options there. We will cover the “Post Settings” next and share some more details, but this is to grab your attention before jumping into it.
Post Settings:
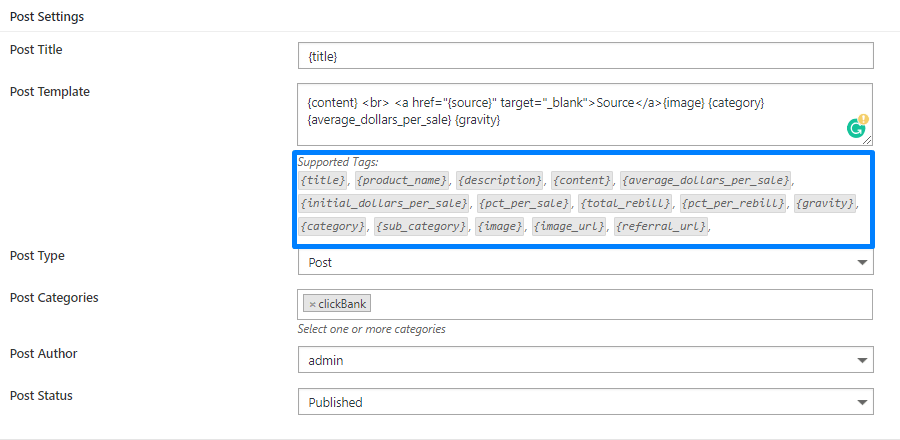
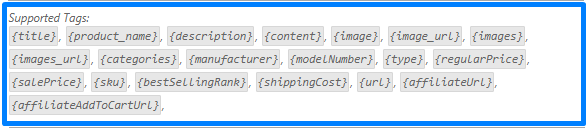
Under this section, you will find some of the most important settings of your post. First, the section begins with “Post Title” you should put {title} here. {title} is there by default so you can just leave it like that. There is a list of supported tags under post template. So, if you want to customize it you can do so. Next is the “Post Template” option. The supported tags are displayed right under the “Post Template” option. For example, you can select them in any order to customize your post. Feel free to experiment with them and create something that stands out. The upcoming features are more straightforward and you should be comfortable with them. The “Post Type” section gives two options to make a post or to create a new page. “Post Categories” allows you to add categories to your post. You can only add pre-created categories so you must create the categories before you can choose them. You can choose a different number of categories from the category list. Then comes the “Post Author” and it gives you the ability to select the author of the post while the last option called “Post Status” gives you four different options. The options are Draft, Private, Pending and Published. Now you should understand that you have complete control over the whole post.
Note:
If you do not have pre-created categories you can save the campaign as a draft and jump to create your desired categories. Then you will need to reopen the draft and continue working. Easy as a breeze.
Advance Settings:
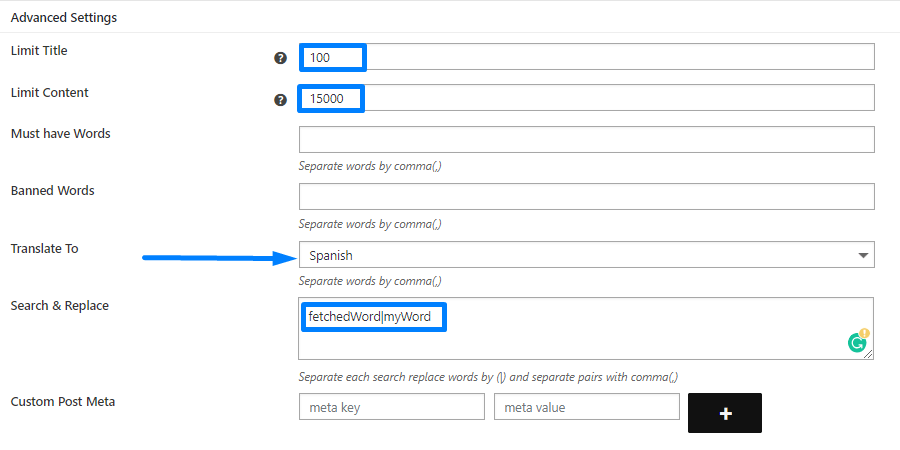
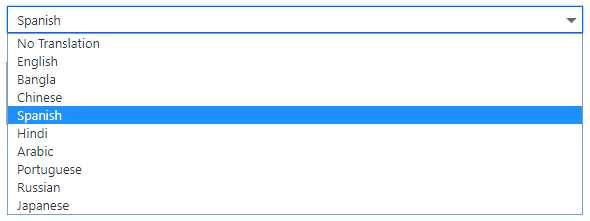
“Limit Title” and “Limit Content” works in a similar fashion. They limit the content length based on the character count. You need to enter two different numbers to restrict the length of the title and content. You can, of course, leave them empty if you do not want to limit them. The next option is “Must have Words” and this will restrict the plugin to fetch posts without that specific word/words. Next comes another very strong feature called the “Banned Words”. Set the words that you do not want to appear in your post. This will filter the posts and do not fetch anything that contains those banned words. In addition to that, you have a translation option. Currently, WP Content Pilot PRO supports translation nine major languages. We will add more language support in the future.
The “Search & Replace is one of the most advanced features of the WP content pilot. Here you have to enter pairs of words. You can add many pairs separated with a comma. In each pair, the second word will replace the first one. This will give you the power to change any unwanted word with your desired one. Finally, the “Custom Post Meta” section will allow you to add post meta beyond the WordPress defaults.
That was everything you need to do to run an awesome ClickBank custom campaign and of course fully automated. That wasn’t so hard. What do you think?
Now, the question is how do you run a BestBuy campaign?
The BestBuy campaign also follows the same pattern like ClickBank campaign. However, the only differences will be the keywords and the categories.
Apart from this, the post template has different tags that do not match with ClickBank campaign.
You will find everything easy to follow.
We are wrapping up. Everything should be fine, but still, if you need help with anything we are always here.